Resources Hub

Will It Be More Or Less Cost Effective To Additively Manufacture That Part?

Rick Burke
— April 26, 2021
Listen to this Article
1×
00:00
00:00
Digital manufacturing simulation allows design engineering and manufacturing teams to simulate the production of a part through a variety of manufacturing processes to determine the most cost-effective approach.
In this article co-written by Amanda Bligh, Ph.D. from aPriori, and Kirk Rogers, Ph.D., from The Barnes Group Advisors, they share an example of a small actuator housing part, geometry-based manufacturing cost estimates comparing traditional manufacturing processes with additive manufacturing, and screenshots of results gleaned from aPriori’s digital manufacturing simulation software to compare best options for manufacturing processes.
Additive manufacturing has become a very popular manufacturing process in recent years. There are times when it is cost-effective to additively manufacture a part, but there are also times when it is not.
“…there’s no way to get into production without being cost competitive with conventional manufacturing techniques. If you are not cost competitive, you’re not at the table.”
Matt Sand, President of 3DEO, a Los Angeles, California-based metal AM parts supplier, says that cost is everything when it comes to serial production.
So how do product development teams determine whether it makes sense from a cost perspective to manufacture a part using additive manufacturing?
Traditional Manufacturing Processes
Small housings are typically manufactured by die casting, investment casting, or injection molding processes. Most parts would also require some level of finish machining to achieve tight dimensional tolerances on critical features. In this case, a typical small aluminum housing would be die-cast in volume due to the low cost and high accuracy of the process. However, the die-casting process requires tooling, so it is often not cost-effective for low-volume production or on-demand creation of spares.
Process Comparisons
For each approach, we selected a popular commercially available technology in an appropriate machine size for low-volume production. The premise is to get the same alloy in the ready-to-machine near net shape (NNS) form, followed by machining, finishing, and inspection processes required to complete the part. We’re using AlSi10Mg for the comparison as this alloy can be used in all 3 processes.

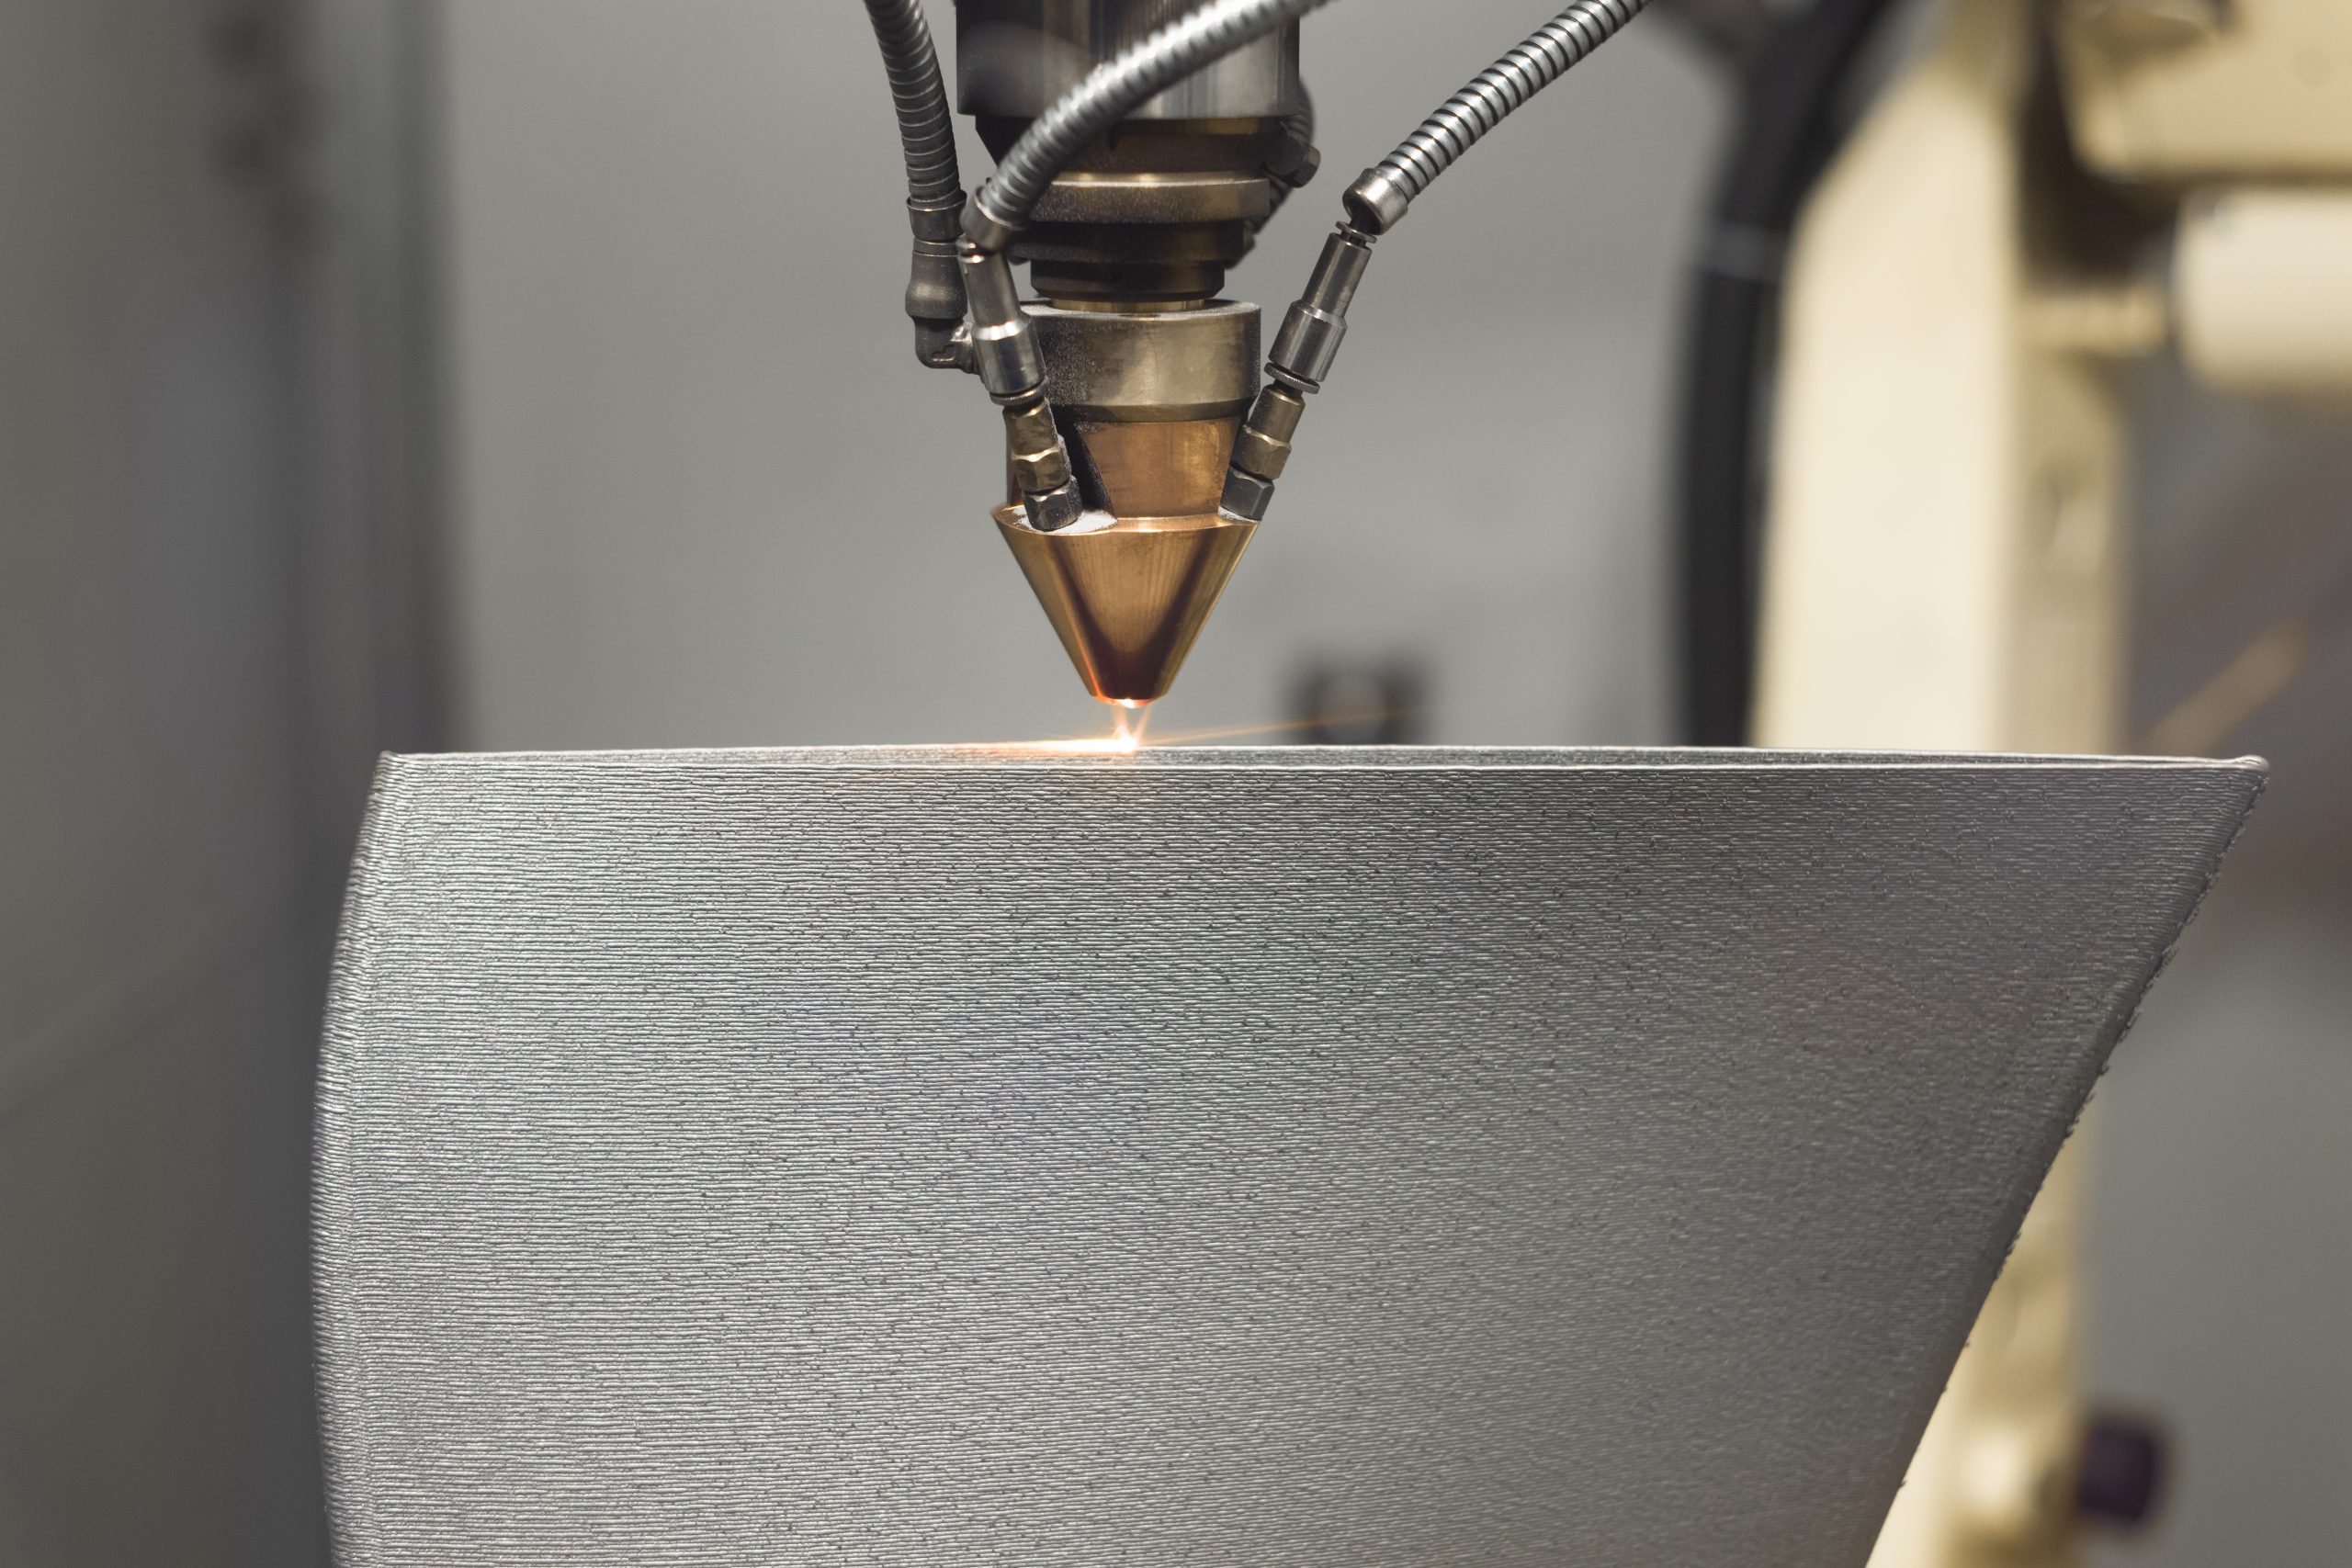
Process 1: Laser Powder Bed Fusion Laser powder bed fusion (L-PBF) utilizes an inert process chamber, a materials distribution system to distribute the feedstock material in the powder bed, and a laser used to weld powder particles together into a fully dense shape. The process generally requires flowable feedstock powders with a particle size range from 15-45 µm. In the L-PBF process, parts are welded to a build platform, and usually stress is relieved on that platform, after a de-powdering step. After stress relief, parts are removed from the platform using a band saw or wire EDM to form the part that is ready for machining and finishing.

Process 2: Investment casting In investment casting, a mold is typically made with hard metal tooling in the external shape of the part. The tooling is typically 2 pieces for a relatively simple part, and can have multiple components in order to mold complex parts. That tooling is placed in a molding press, and wax is injected and cooled to make a wax version of the part to be cast. The wax cores are dipped repeatedly in a ceramic slurry and dried to make a shell (the inverse of the part), and the shell is baked to melt out the wax version of the part, then heated to high temperature in order to make a porous ceramic shell that the metal is poured into in order to form the casting. Other features are added to direct molten metal into the shell appropriately, and molten metal is poured into the mold, forming a casting. Once the casting is solidified, the ceramic shell is broken off the casting, and extra features are removed with a band saw or cutting torch, forming a ready-to-machine part. Wax-forming dies are typically relatively simple tools with moderate cost.
Process 3: Die Casting In die casting, first, a complex tool with cooling passages and all the part features must be manufactured out of a material that has a higher melting temperature than the part that is being manufactured. The die is integrated with a die-casting machine and set up so that the mating surfaces of the tool mate effectively to seal the molten metal inside the tool while casting. The tool is pre-heated, then injected with molten metal at high pressure in order to fill the smallest cavities, and then cooled so that the part cools to below its melting temperature. Once the part is cool enough, it is ejected from the tool, and any added features added to control material flow into the part are removed with a band saw or cutting torch, forming a ready-to-machine part.
*Die-casting tools are the most complex and highest cost in this comparison.
The Comparison
We used aPriori to compare the three options for time and cost-effectiveness. The four steps in this process were:
- Load the CAD file – aPriori recognizes the geometry of the part and uses it as a key input to estimate cycle time and cost.
- Create Base Options – With the geometry loaded, the settings for each of the three manufacturing options were defined as separate scenarios.
- Complete Estimates – The base scenarios were quickly duplicated using the Matrix Costing Tool in aPriori, defining the set of inputs for annual volume and batch size.
- Generate Reports – With the completed scenarios cost in the aPriori software, reports were created, which allowed for further analysis and comparison of the data.
These steps were evaluated in less than 2 hours of engineering time based on an existing 3D part model.

The estimated cost calculated in aPriori (shown in Figure 4 below) for each of the three processes includes the common direct costs related to manufacturing (such as material, labor, and direct machine overhead) as well as periodic and one-time costs. The most important of these for this example are:
- Batch Costs – The cost of the time and personnel required to set up the machine for each order quantity. This cost is split across the number of parts made during that setup.
- Capital Investment Costs – The cost of any one-time investments, such as the tooling used in die and sand casting, and programming costs related to secondary operations for additive manufacturing benefits. These costs are split across the total number of parts produced.

As shown in Figure 4, the cost of raw material is higher for additive manufacturing, but the one-time costs for investment casting and die casting are much higher than that of additive manufacturing. Investment casting has a large labor cost related to the more manual processing and longer cycle time. A similar impact can be seen in both the direct overhead and labor cost for the additive option. All these values are summed with the amortization considerations described above into the Fully Burdened Cost (FBC), which is the point of comparison we will be using.
The Results
As can be seen in Figure 5, if we produce 1 batch of parts per year, L-PBF is the most cost-effective option until about 100 parts has been produced. After 100 parts, die casting becomes more cost-effective. Investment casting is slightly less expensive than die casting up to about 35 parts, owing the difference in tooling costs and labor needed to produce each part. However, the high cost of die-cast tooling is eclipsed by the labor cost of investment casting at about 35 pieces.

Let’s say that instead of 1 batch per year, we produce 12 in order to control inventory or respond to customer demand. In Figure 6, L-PBF is the most cost-effective process up to about 70 parts (vs 100), and Die casting is nearly always more cost-effective than Investment casting.

Reviewing the results in Table 1, it is clear to see that there are in fact cost benefits for the use of additive manufacturing in this small actuator housing part, demonstrating that additively manufacturing a part designed for a traditional manufacturing process can be cost-effective. For high-volume applications of this part, the die-casting process makes the most sense from a cost perspective, and investment casting would be a poor choice in both low and high-volume applications.
| Process | Batches Per Year | Most Cost Effective |
| Investment Casting | 1 | Never |
| 12 | Never | |
| Additive Manufacturing | 1 | < 100 |
| 12 | < 65 | |
| Die Casting | 1 | >100 |
| 12 | >65 |
If you’d like to learn more about how to drive innovation with additive manufacturing, check out our on-demand webinar below.


Additive Manufacturing: Finding the Breakeven Point with aPriori
On Demand WebinarWATCH NOW